

|
FSRCanada |

|
Mass Print Tek |
Mass Spore PrintingBy The Mushroom Growers Guild
Items needed 1. Glove box 2. Sharp knife 3. Lots of mushrooms 4. Card Stock Paper 8.5x11 (From office supply) 5. 3”x4” zip lock bags (Local hobby store) 6. Avery return address labels #8167 (80 labels per page) 7. scissors 8. zip lock sandwich bag |
|
Last updated November 13, 2004 |
|
The first step is to get your glove box good and clean. I like to wash mine out with 90% alcohol and then run the hepa filter for 30 to 45 minuets. Next you need to get a good sharp knife. I use a scalpel with a sterile blade. An Exacto knife or hobby knife will work just as well. |
|
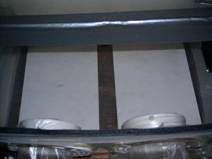
Next you need 4 sheets of card stock (8.5x11) I get this at the local office supply and it is the same thickness as business cards. |
|
|
|
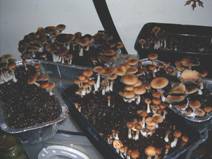
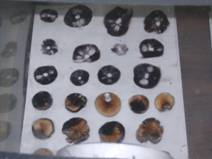
In the glove box we want to use the knife to remove the cap from the stem. You want to |
|
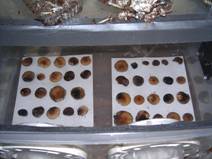
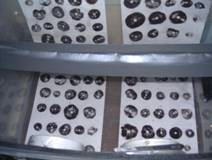
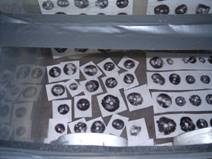
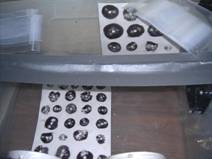
Before long both sheets are full! |
|
|
|
|
|
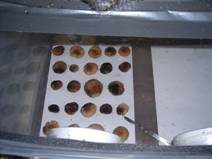
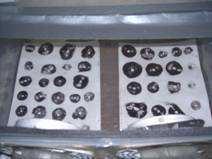
Follow the same procedures. Cut the stem off and lay the caps down on the page in rows. |
|
Now we have some time to kill. You need to wait 24 hours for the caps to drop their spores. So get out the Avery labels and your favorite word processor and make up some labels for your prints. You should put the species and strain on the label as well as any disclaimer you want based on the kind of mushroom you are printing. Then print yourself off a sheet or two of labels! |
|
(Time warp 24 hours)
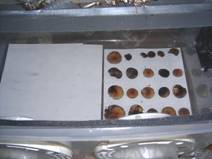
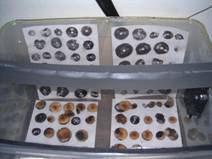
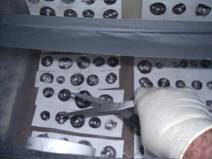
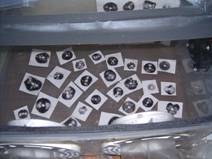
Now that the caps have dropped there spores it is time to remove the caps. I like to use a thumb tack and stick it in the cap, then lift it away |
|
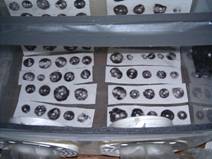
Soon you will have the first set of caps out of the way! |
|
|
|
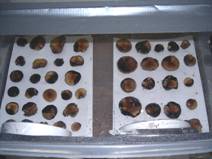
Continue to remove the caps as before. This will leave you with nothing but beautiful prints! Note: the crud on the top left that looks like it is on the print sheet is really on the Plexiglas top. |
|
|
|
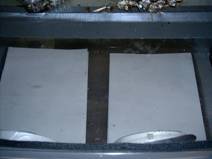
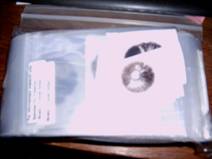
Now you want to separate the prints. |
|
Simply cut the paper so that each print is on it's own square. I have found it easer to do one page, then bag the prints, then go back and do the next page. The first page is always the hardest due to the lack of space. |
|
|
|
Now that you have more prints than you know what to do with. Why don't you donate a bunch of prints to your local free spore ring! |
